Orange Creamsicle Dream Bars Recipe
Introduction
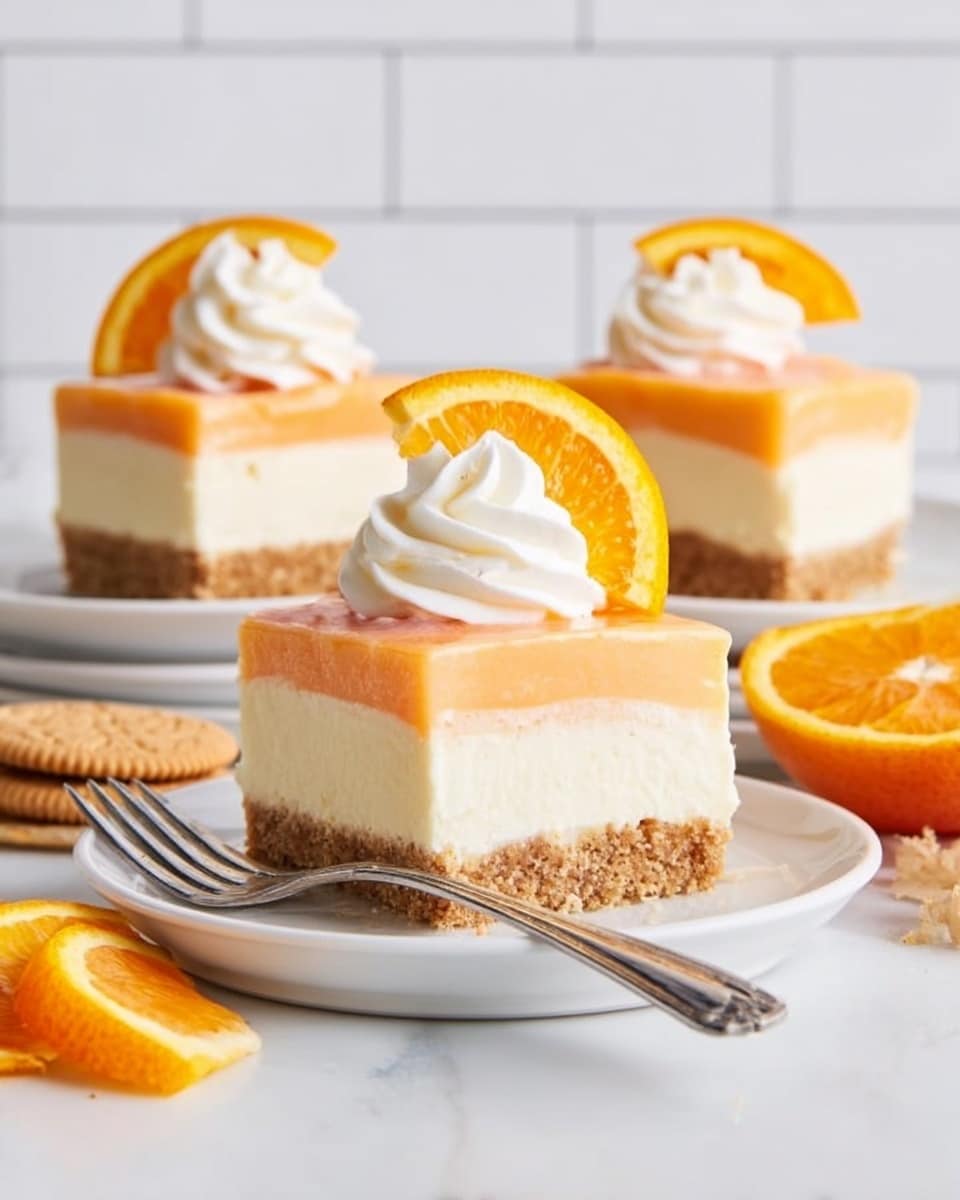
Orange Creamsicle Dream Bars are a refreshing and creamy treat that captures the nostalgic flavor of the classic creamsicle. With a crunchy Nilla wafer crust, tangy orange gelatin, and smooth cream cheese layers, these bars are perfect for any occasion.
Ingredients
- 8 ounces Cool Whip (divided into 3 separate cups)
- 1 ⅓ cups Nilla Wafer cookie crumbs
- 5 tablespoons unsalted butter
- 3 ounces orange gelatin
- 3/4 cup boiling water
- 3/4 cup cold water
- 8 ounces cream cheese (room temperature)
- 1/4 cup powdered sugar
- 2 teaspoons orange extract
- 8 drops orange Wilton Gel Food Color (optional)
- 8 ounces cream cheese (room temperature)
- 1 cup confectioners’ sugar
- 1 teaspoon pure vanilla extract
- 1 cup Cool Whip
Instructions
- Step 1: Line an 8 x 8-inch baking pan with parchment paper to allow easy removal of the bars for slicing.
- Step 2: Melt 5 tablespoons of butter in a microwave-safe bowl for about 30 seconds, stirring and melting for an additional 5-10 seconds if needed.
- Step 3: Pulse the Nilla Wafers in a food processor until finely ground. Combine the cookie crumbs with the melted butter using a rubber spatula until well mixed.
- Step 4: Press the crumb mixture evenly into the prepared pan to form the crust. Place the pan in the freezer for at least 30 minutes while preparing the remaining layers.
- Step 5: In a 2-cup measuring cup, dissolve the orange gelatin in 3/4 cup boiling water, stirring thoroughly. Add 3/4 cup cold water and stir again. Refrigerate until the mixture is completely cooled but not set, about 10 minutes.
- Step 6: In a mixing bowl, beat 8 ounces of cream cheese with powdered sugar, orange extract, and orange food coloring (if using) until smooth.
- Step 7: Slowly add the chilled gelatin mixture to the cream cheese while mixing continuously to achieve a smooth consistency. Refrigerate this orange cream mixture for one hour to thicken.
- Step 8: In another bowl, beat the remaining 8 ounces of cream cheese with confectioners’ sugar and vanilla extract until creamy. Fold in 1 cup of Cool Whip using a rubber spatula.
- Step 9: Spread the cheesecake mixture evenly over the frozen crust using an offset spatula.
- Step 10: Fold the remaining 2 cups of Cool Whip into the chilled orange cream mixture until smooth and well combined.
- Step 11: Pour the orange cream layer gently over the cheesecake layer and spread evenly with an offset spatula.
- Step 12: Refrigerate the assembled bars overnight or for at least 6 hours to allow layers to set properly before slicing and serving.
Tips & Variations
- Use vanilla or orange-flavored wafers for an added burst of flavor in the crust.
- For a more natural color, substitute the orange food coloring with fresh orange zest.
- Chill gelatin mixture thoroughly but avoid letting it set to ensure a smooth orange cream layer.
- Try swapping orange extract for lemon or lime extract to create different citrus flavors.
Storage
Store the bars in an airtight container in the refrigerator for up to 4 days. For longer storage, freeze the bars for up to 1 month; thaw in the refrigerator before serving. Reheat is not recommended as it may affect the texture of the creamy layers.
How to Serve

Serve this delicious recipe with your favorite sides.
FAQs
Can I use homemade whipped cream instead of Cool Whip?
Yes, homemade whipped cream can be used as a substitute, but be sure it is stabilized to maintain the structure of the bars.
How do I prevent the crust from becoming soggy?
Chilling the crust in the freezer before adding the layers helps it firm up and stay crisp. Pressing the crust firmly and evenly also creates a sturdy base.
PrintOrange Creamsicle Dream Bars Recipe

These Orange Creamsicle Dream Bars are a delightful no-bake dessert featuring a crisp Nilla wafer crust, a smooth, tangy orange gelatin cream layer, and a rich, creamy cheesecake topping. Perfectly chilled and set overnight, they create a dreamy combination reminiscent of a classic creamsicle treat, ideal for summer gatherings or a refreshing dessert anytime.
- Prep Time: 25 minutes
- Cook Time: 0 minutes
- Total Time: 7 hours 25 minutes
- Yield: 16 bars 1x
- Category: Dessert
- Method: No-Cook
- Cuisine: American
Ingredients
Crust
- 1 ⅓ cups Nilla Wafer Cookie Crumbs
- 5 tablespoons unsalted butter
Orange Gelatin Layer
- 3 ounces orange gelatin
- 3/4 cup boiling water
- 3/4 cup cold water
- 8 ounces cream cheese (room temperature)
- 1/4 cup powdered sugar
- 2 teaspoons orange extract
- 8 drops orange Wilton Gel Food Color (optional)
- 2 cups Cool Whip (divided)
Cheesecake Layer
- 8 ounces cream cheese (room temperature)
- 1 cup confectioners’ sugar
- 1 teaspoon pure vanilla extract
- 1 cup Cool Whip
Instructions
- Prepare Nilla Wafer Crust: Line an 8×8-inch baking pan with parchment paper to easily remove bars later. Melt 5 tablespoons of unsalted butter in the microwave for about 30 seconds, stirring and reheating briefly if needed. Process Nilla Wafers into fine crumbs using a food processor, then combine crumbs with melted butter until fully incorporated. Press the mixture evenly into the prepared pan to form the crust. Place the pan in the freezer for at least 30 minutes while preparing the next layers.
- Make Orange Gelatin: In a 2-cup measuring container, dissolve the orange gelatin powder in 3/4 cup boiling water, stirring until completely dissolved. Add 3/4 cup cold water and stir again. Refrigerate this mixture until it is completely cooled but not yet set, about 10 minutes.
- Prepare Orange Cream Layer: Beat 8 ounces of cream cheese with powdered sugar, orange extract, and optional orange gel food coloring until smooth. Slowly incorporate the chilled orange gelatin mixture into the cream cheese blend while mixing thoroughly to achieve a smooth consistency. Chill this orange cream mixture in the refrigerator for one hour to thicken.
- Make Cheesecake Layer: In a separate bowl, beat 8 ounces of cream cheese, confectioners’ sugar, and pure vanilla extract until smooth and creamy. Gently fold in 1 cup of Cool Whip using a rubber spatula.
- Assemble Cheesecake Layer: Remove the crust from the freezer and place dollops of the cheesecake mixture over it. Spread evenly using an offset spatula to form a uniform layer.
- Combine Remaining Cool Whip and Orange Cream: Fold the remaining 2 cups of Cool Whip into the chilled orange cream mixture until fully combined, soft, and smooth.
- Add Orange Cream Layer: Gently pour the orange cream mixture over the cheesecake layer in the pan. Spread evenly with an offset spatula for a flawless finish.
- Chill Bars: Refrigerate the assembled bars overnight or for at least 6 hours to allow layers to set completely before slicing and serving.
Notes
- Press the crust firmly to ensure it holds together well after freezing.
- Pour the chilled gelatin mixture slowly into the cream cheese to avoid lumps and ensure a smooth, consistent texture.
- Allow adequate chilling time for each layer to set properly for the best texture and ease of slicing.
- If desired, adjust the orange gel food coloring for a more vibrant look.
- Use parchment paper with overhang for easy removal of bars from the pan.
Keywords: Orange Creamsicle Bars, No-Bake Dessert, Orange Gelatin Bars, Cheesecake Bars, Summer Dessert, Cool Whip Dessert