Chocolate Pie Recipe
Introduction
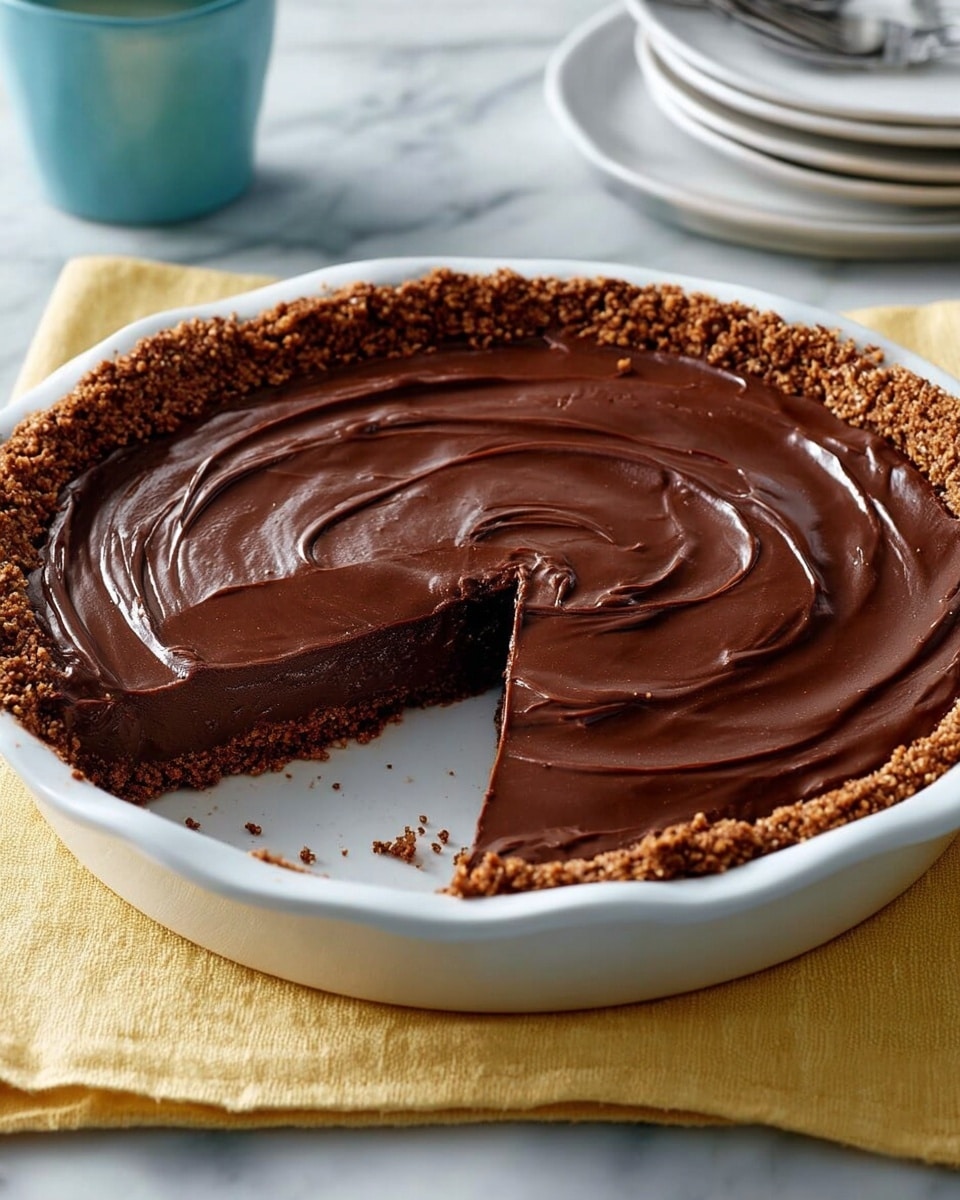
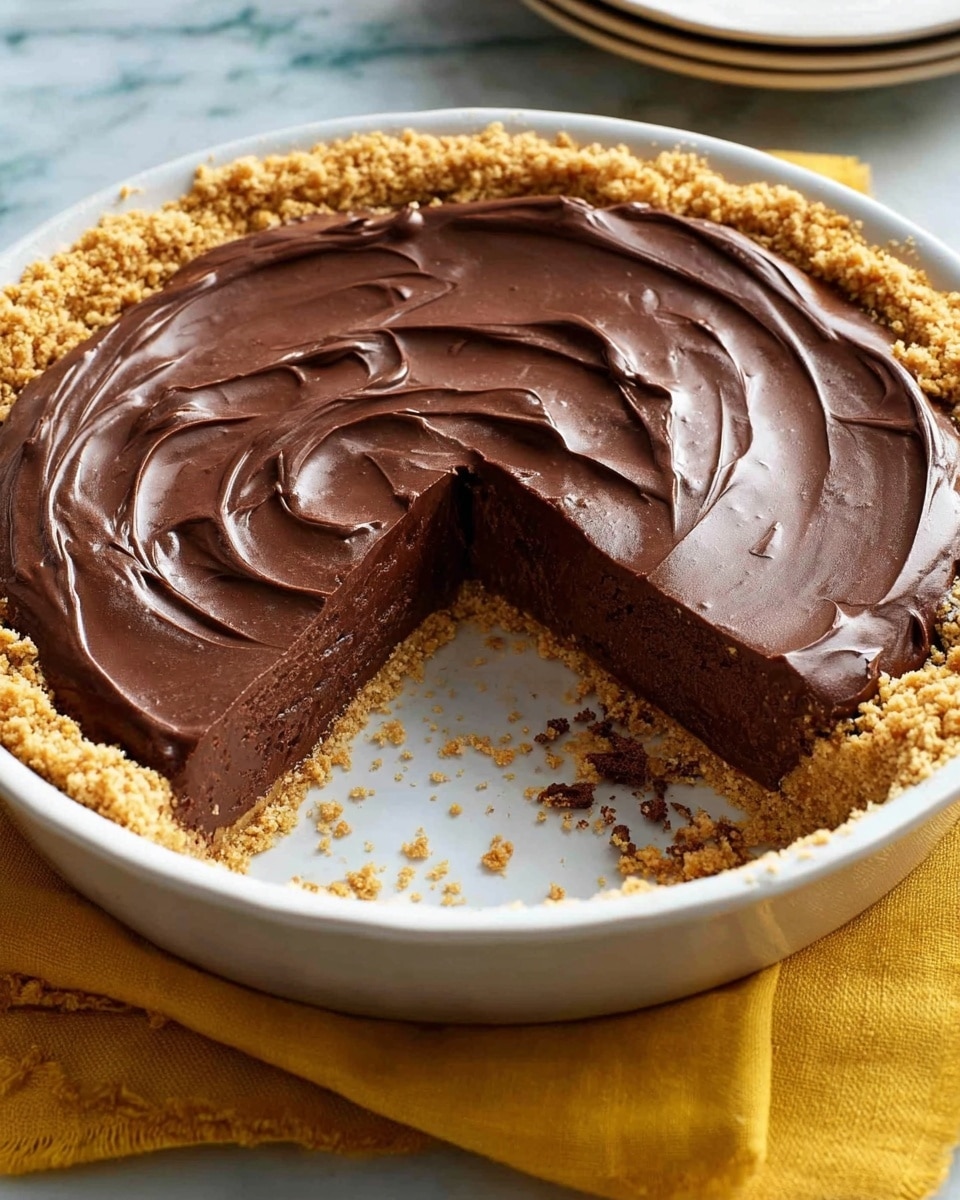
This classic chocolate pie is rich, creamy, and incredibly satisfying. With a smooth chocolate filling set in a flaky pre-baked crust, it’s an easy dessert that impresses every time. Perfect for any occasion or whenever a chocolate craving strikes.
Ingredients
- 1 pre-baked 9-inch pie crust
- 1 1/2 cups sugar
- 1/4 cup cornstarch
- 1/4 tsp. salt
- 3 cups whole milk
- 4 egg yolks
- 6 1/2 oz. bittersweet chocolate, finely chopped
- 2 tsp. vanilla extract
- 2 Tbsp. butter
Instructions
- Step 1: In a saucepan, whisk together the sugar, cornstarch, and salt. Then, whisk in the milk and egg yolks until the mixture is smooth.
- Step 2: Cook over medium heat, stirring constantly, for 6-8 minutes until the mixture comes to a boil and thickens significantly.
- Step 3: Remove the pan from heat immediately to prevent overcooking.
- Step 4: Stir in the chopped chocolate, vanilla extract, and butter until everything is completely melted and the pudding is smooth.
- Step 5: Pour the hot pudding filling into the cooled, pre-baked pie crust.
- Step 6: Refrigerate the pie uncovered for at least 4 hours, or until completely cold and set.
- Step 7: Serve chilled, optionally topped with a dollop of whipped cream for extra indulgence.
Tips & Variations
- For a richer flavor, try using half-and-half or whole cream in place of some of the milk.
- To add texture, sprinkle toasted nuts or chocolate shavings on top before serving.
- If you prefer a sweeter pie, use semi-sweet chocolate instead of bittersweet.
- Make sure to stir constantly while cooking to avoid lumps and prevent the pudding from burning.
Storage
Store the chocolate pie covered in the refrigerator for up to 3 days. Keep it chilled until ready to serve. Reheat is not recommended, as the texture is best enjoyed cold and firm.
How to Serve
Serve this delicious recipe with your favorite sides.
FAQs
Can I use a homemade pie crust instead of a pre-baked one?
Yes, just be sure to prebake your crust fully before adding the chocolate filling to keep it crisp and prevent sogginess.
What can I substitute for cornstarch if I don’t have it?
You can use all-purpose flour as a thickener, but use about twice the amount called for. Keep in mind the texture might be slightly different.
PrintChocolate Pie Recipe
This luscious Chocolate Pie recipe features a smooth, rich chocolate pudding filling nestled in a pre-baked pie crust. Made with bittersweet chocolate and a creamy custard base, this no-bake pie sets beautifully in the refrigerator for a decadent, chilled dessert that’s perfect for any occasion.
- Prep Time: 15 minutes
- Cook Time: 8 minutes
- Total Time: 4 hours 23 minutes
- Yield: 8 servings 1x
- Category: Dessert
- Method: Stovetop
- Cuisine: American
Ingredients
Pie Crust
- 1 pre-baked 9-inch pie crust
Chocolate Filling
- 1 1/2 cups sugar
- 1/4 cup cornstarch
- 1/4 tsp. salt
- 3 cups whole milk
- 4 egg yolks
- 6 1/2 oz. bittersweet chocolate, finely chopped
- 2 tsp. vanilla extract
- 2 Tbsp. butter
Instructions
- Mix Dry Ingredients and Milk: In a saucepan, whisk together sugar, cornstarch, and salt to combine the dry ingredients evenly. Gradually whisk in the milk and then add the egg yolks, continuing to whisk until the mixture is smooth and fully blended.
- Cook the Custard: Place the saucepan over medium heat and cook, stirring constantly with a whisk or spatula to prevent lumps and burning, for 6 to 8 minutes. Continue until the mixture thickens significantly and reaches a boil.
- Remove from Heat: As soon as the pudding mixture reaches a boil and thickens, immediately take the pan off the heat to avoid overcooking or curdling of the eggs.
- Add Chocolate and Flavorings: Stir in the finely chopped bittersweet chocolate, vanilla extract, and butter while the mixture is still hot. Mix thoroughly until the chocolate and butter are completely melted and the pudding is smooth and glossy.
- Fill the Pie Crust: Pour the warm chocolate pudding evenly into the cooled, pre-baked 9-inch pie crust, smoothing the surface with a spatula if needed.
- Chill the Pie: Place the pie uncovered in the refrigerator and chill for at least 4 hours, allowing the filling to firm up completely for optimal texture and flavor.
- Serve: Once the pie is fully chilled and set, serve it cold. For an extra touch, add a dollop of whipped cream on top for garnish and extra creaminess.
Notes
- Ensure the pie crust is fully cooled before adding the hot chocolate pudding to prevent sogginess.
- Use high-quality bittersweet chocolate for the best flavor.
- Stir constantly when cooking the custard to avoid lumps and burning.
- Allow the pie to chill sufficiently to ensure the filling sets properly.
- This pie is best served within 2 days for freshness.
Keywords: Chocolate Pie, Chocolate Pudding Pie, No-Bake Pie, Bittersweet Chocolate Dessert, Creamy Chocolate Pie